Output Presets
Derivv Pro uses the concept of an output preset to determine the size and other attributes of derivative images. This page will cover how to create, add dimensions, rename and save, and customize a preset on Derivv Pro.
Creating a preset
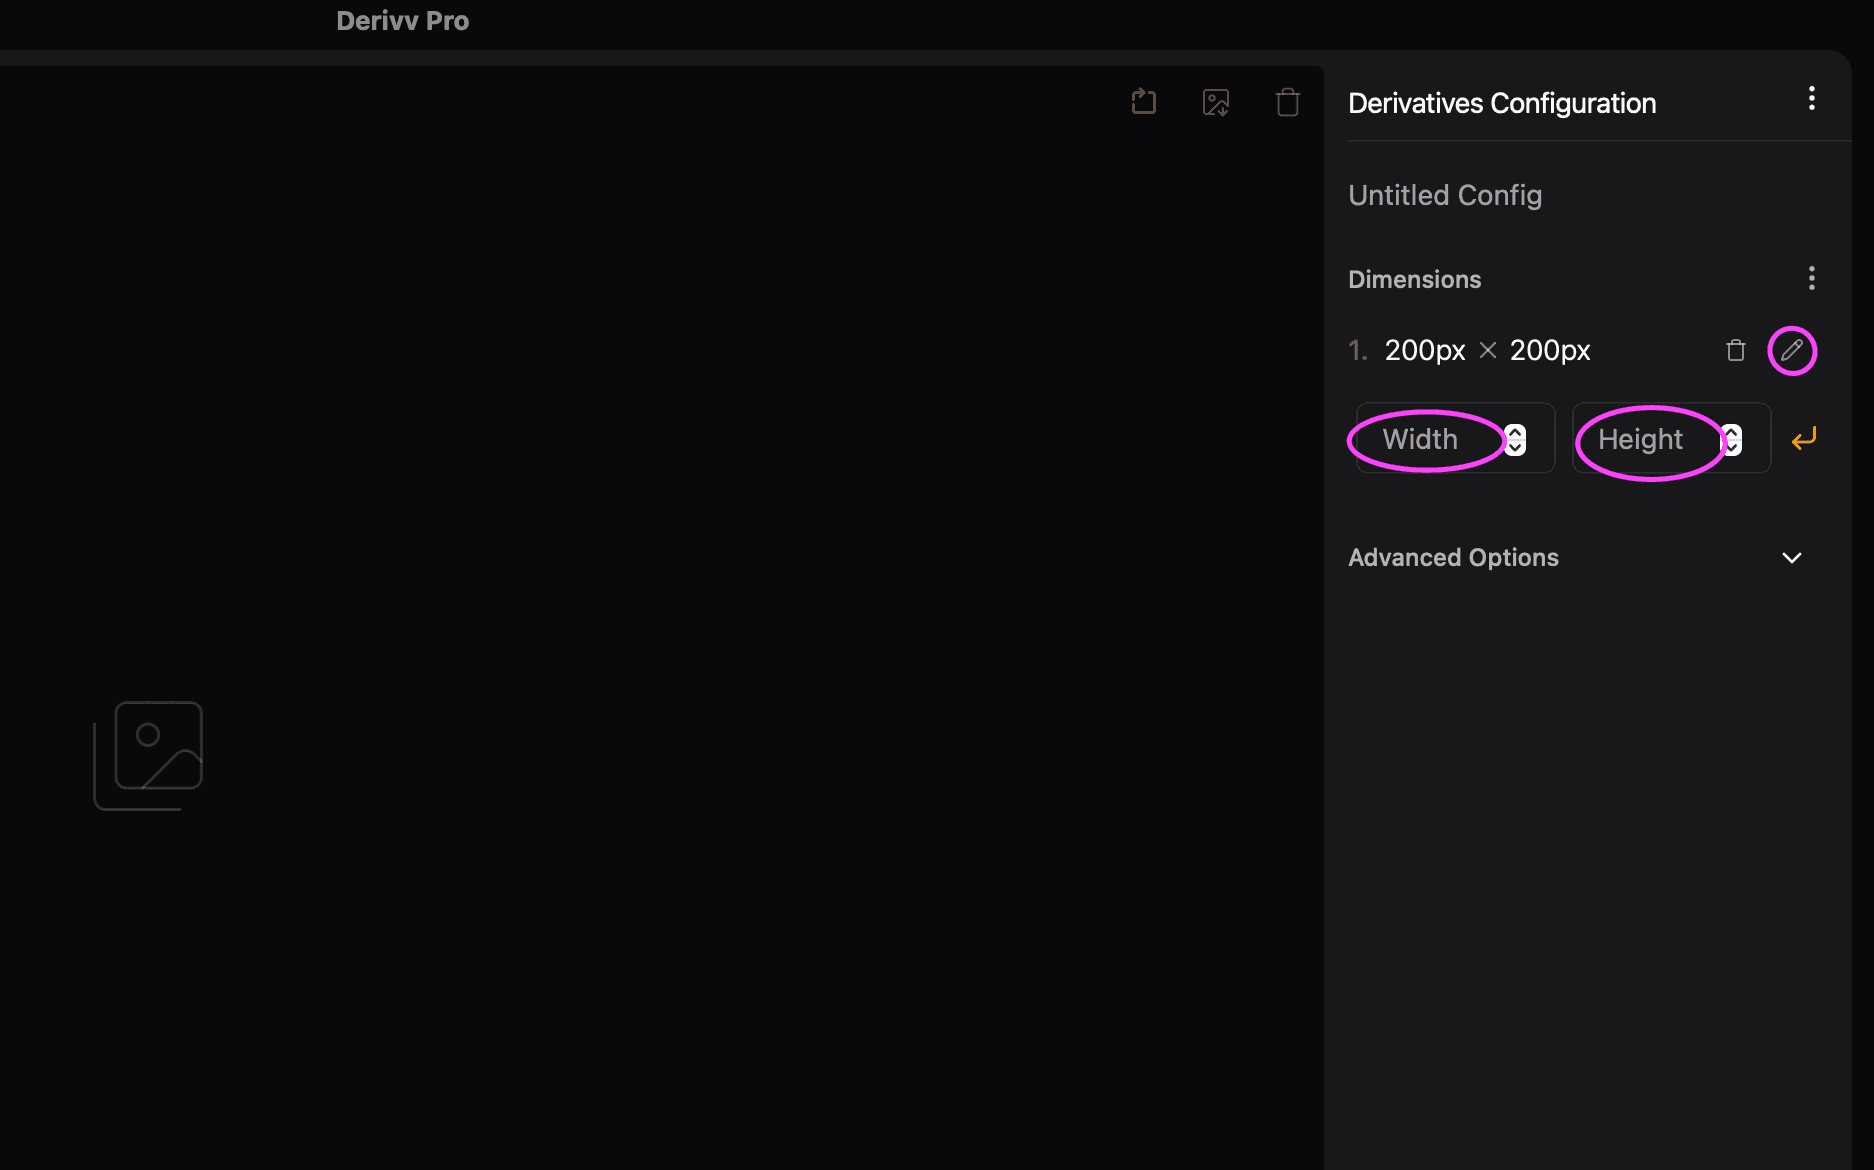
When you first open the app, a default preset with a 200x200px dimension setting is created. When you add an image, this will create one derivative image with that dimension. You can add more dimensions by clicking the pencil icon to the right of the dimensions or by entering the width and height in their respective fields and pressing return.
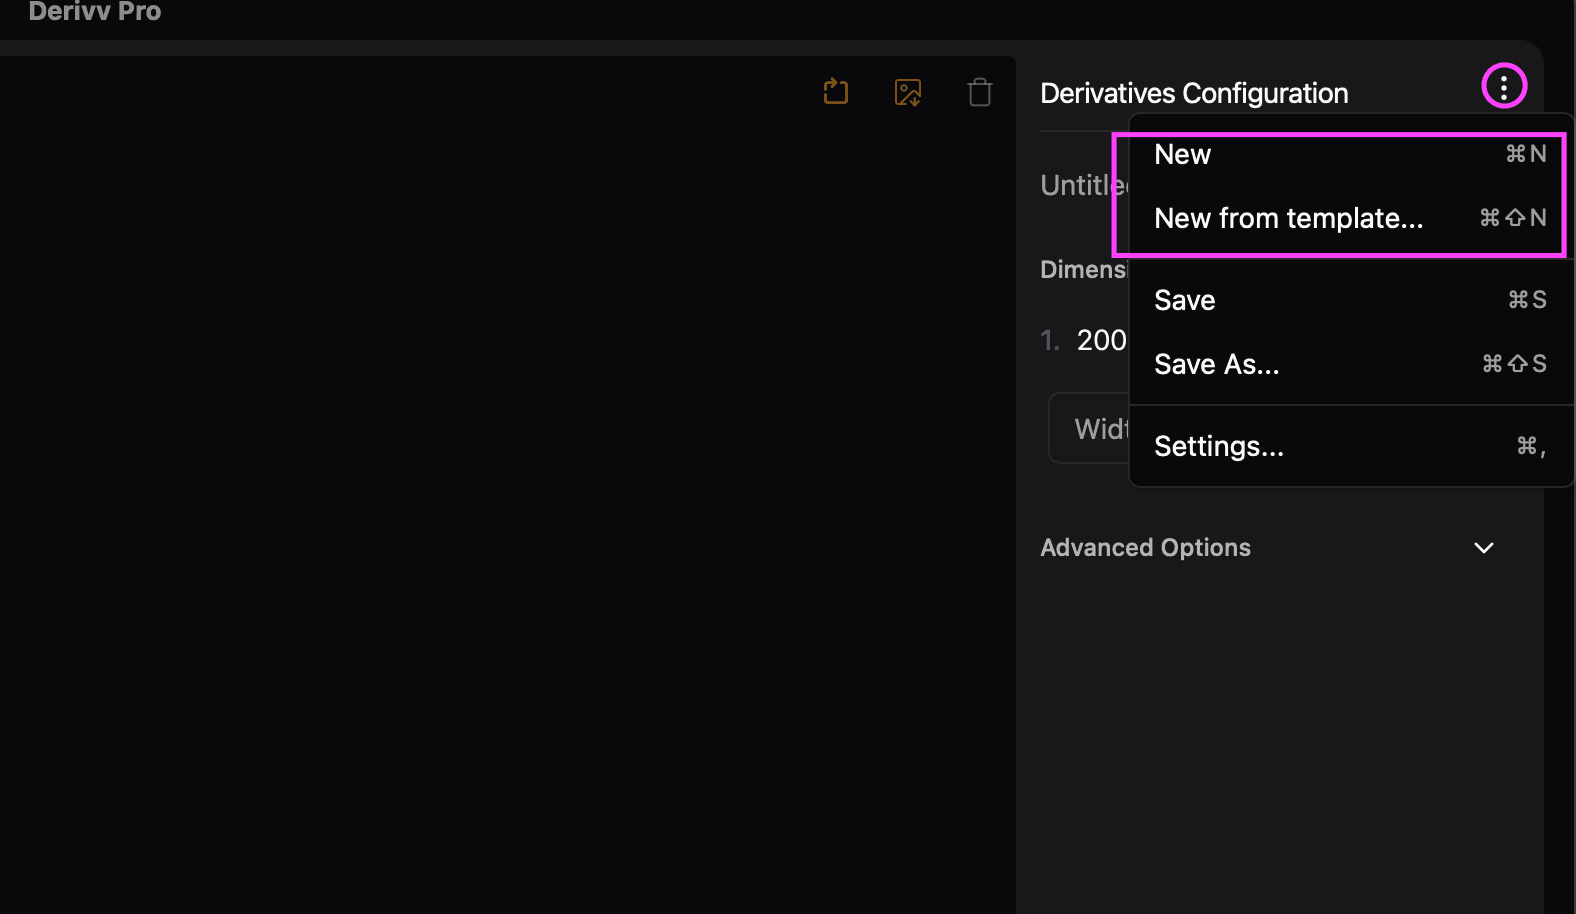
You can create a new preset by either clicking on the preset menu button or pressing ⌘N for Mac or ctrl+n on Windows. If you want to create a new preset from a template, you can click on the template menu button or press ⌘⇧N for Mac or ctrl+shift+n on Windows.
Creating dimensions
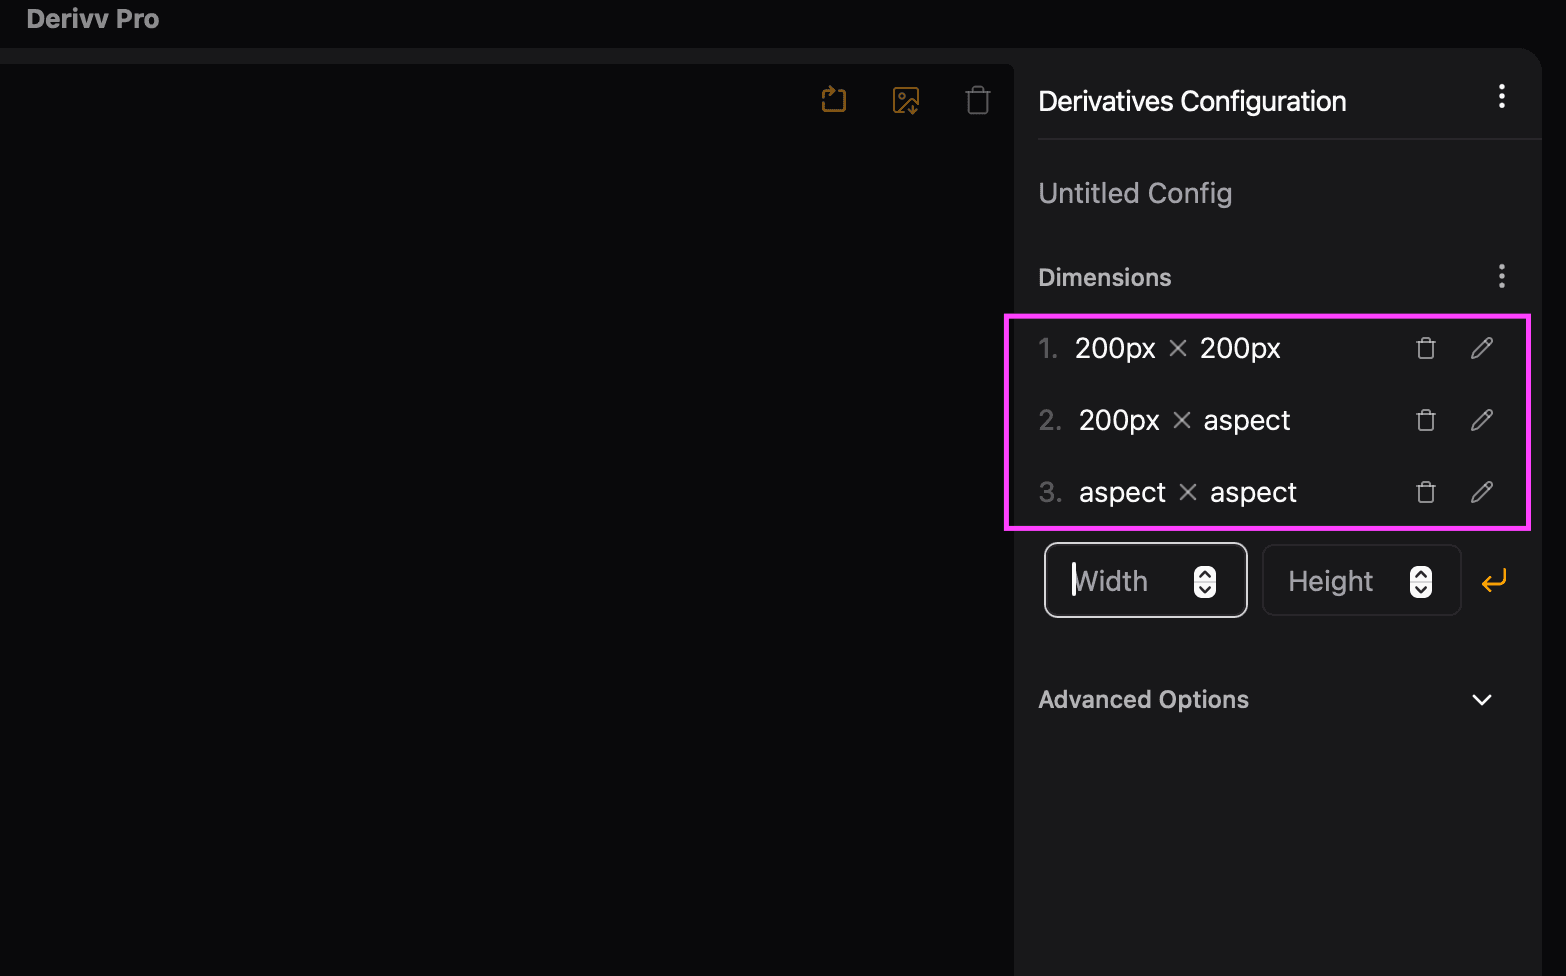
Dimensions determine the size of the derivative image(s). When entering dimensions, you have 3 options:
- Enter a width and height for a fixed size. e.g.
200x200 - Enter a width or height to retain the original aspect ratio. e.g.
200 - Leave width and height blank to use the original image size (useful for keeping the original size but using other features like compression and format conversion)
Renaming and saving
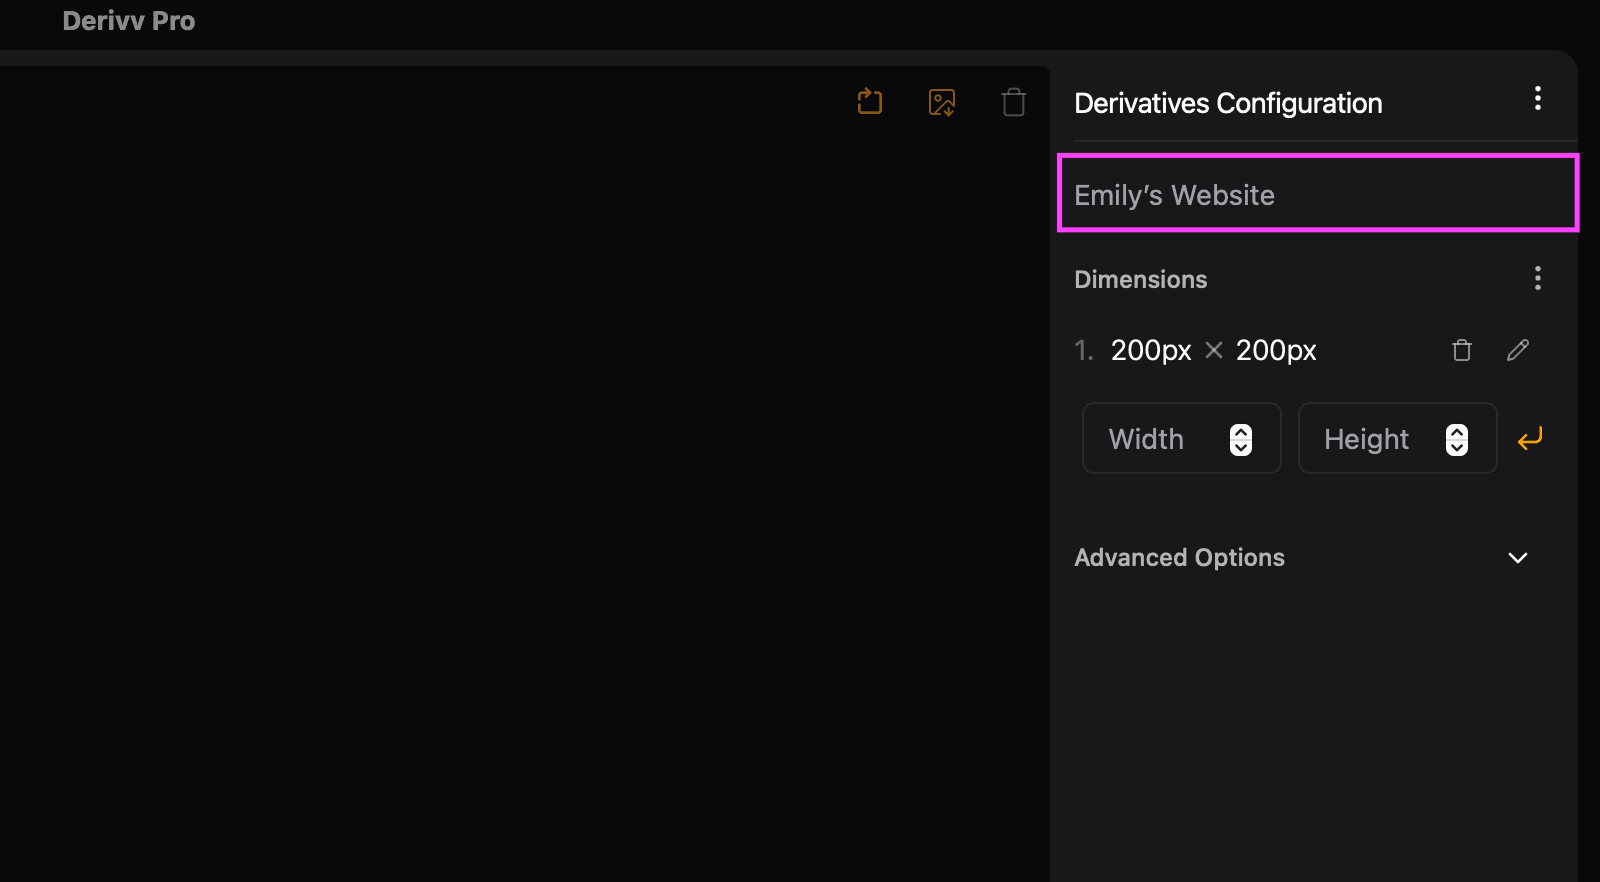
You can rename a preset by clicking on the preset name, typing a new name, and pressing return or clicking outside the input field.
Save a preset by pressing ⌘S for Mac or ctrl+s for Windows on your keyboard. You can also save a preset by clicking the "Save" menu item.

Customizing a preset
There are many ways to customize a preset such as changing the compression, units, file type, fit, and more. For a full list of options, see the presets resource.